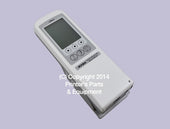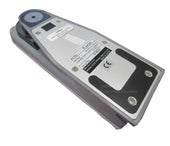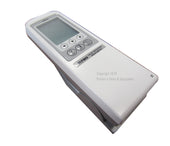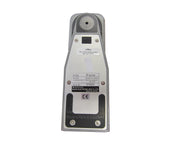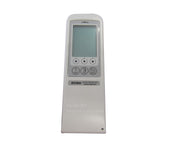
COLOR REFLECTION R72 DENSITOMETER R720 (Status-E, 3.0mm,(Japan)
-
Density
-
Density Difference • Dot Area
-
Dot Gain
-
Auto Function
HIGH PERFORMANCE & RELIABILITY
Ihara Electronic Industries utilizes advanced microcomputer technology
to ensure superior performance and reliability for its entire line of densito- metric products. Standard functions include: density, density difference, dot area, dot gain and auto-function.
MENU DRIVEN COMMANDS
Simply select the functions desired. No memorization or operation manual required.
SELF-GUIDING PROMPTS
Clear and concise instructions are prompted across the large graphic LCD display in every measurement.
HELP KEY PROVIDES EXPLANATION OF KEY FUNCTIONS
Detailed explanations are available for all measurement functions along with answers to frequently asked questions.
QUICK CALIBRATION
It takes seconds to calibrate using the quick calibration function. Standard calibration is also available.
AUTO-FUNCTION
Auto-function allows the user to measure density and dot gain, interchangeably.
LARGE GRAPHIC LCD DISPLAY
The easy to read graphic LCD display allows the user to determine the precise configuration desired, including right or left handed view, two or three decimal precision and display options.
PRINTER AND COMPUTER INTERFACE
The configurable RS-232C serial interface is capable of linking the R720 to a computer or to the IHARA PR-95 printer.
IHARA R720 B & W REFLECTION DENSITOMETER SPECIFICATIONS
• MEASUREMENT FUNCTIONS
Density
Density Difference
Dot Area (Murray-Davies or Yule-Nielsen) Dot Gain
Auto-Function (Automatically measures density or dot gain)
• FILTER RESPONSE Status T
Status E
Status A
• MEASURING GEOMETRY
0°/45° (ANSI PH2.17, ISO 5/4, DIN 16536)
• MEASURING RANGE
Density 0.00D - 2.50D Dot Area 0% - 100%
• REPEATABILITY ± 0.01D or 1%
• ACCURACY
± 0.02D or 2%
• LIGHT SOURCE
Halogen Lamp, Approximately 2856°K
• APERTURE DIAMETER 3.0mm (1.7mm optional)
• DETECTOR
GaAsP Photodiode
• DISPLAY
128 x 64 Dot Graphic LCD
• POWER SUPPLY
Ni-Cad (4.8V), 800mAh
• RECHARGE TIME Approximately 1.5 hours
• MEASUREMENTS PER CHARGE Approximately 4,000 (Internal Testing)
• WARM UP TIME None
• MEASURING TIME Approximately 1 second
• OPERATING TEMPERATURE RANGE 41°F ~ 104°F (5°C ~ 40°C)
• POLARIZATION FILTER (Optional)
• SECURITY USER CODE (Optional)
• DIMENSIONS
2 3/4”W x 2”H x 8 1/4”L (72mm x 50mm x 210mm)
• WEIGHT
1.2 lbs. (With Batteries) (530 g)
• COMPUTER OUTPUT
Configurable RS-232C Serial Interface
• ACCESSORIES
Operation Manual
Calibration Standard
AC Adapter (9V, 500mA, center-negative) Carrying Case
Serial Interface Cable (Optional)
Ihara PR-95 Printer (Optional)
Software (Optional)
Cable Harness (Optional)
Returns
Our policy lasts 30 days. If 30 days have gone by since your purchase, unfortunately we can’t offer you a refund or exchange.
To complete your return, we require a receipt or proof of purchase.
Customized products and gift cards are exempt from being returned.
Heidelberg OEM Parts are subject to re Stocking fees.
Refunds
Once your return is received and inspected, we will send you an email to notify you that we have received your returned item. We will also notify you of the approval or rejection of your refund.
If you are approved, then your refund will be processed, and a credit will automatically be applied to your credit card or original method of payment, within 30 days.
Late or missing refunds
- If you haven’t received a refund yet, first check your bank account again.
- Then contact your credit card company, it may take some time before your refund is officially posted.
- Next contact your bank. There is often some processing time before a refund is posted.
- If you’ve done all of this and you still have not received your refund yet, please contact us at


